This is a project I actually completed this past summer, but I haven't posted details on it before, so decided to do it now!
We had a pair of solid wood end tables that were only about 6 years old, maybe less. They were nice and solid and in good shape, but the surfaces were scratched from our 4 yr old and we didn't care much for the finish/color anymore in our new house.
I decided to give them new life ,and I was on a SERIOUS furniture painting kick this past summer! Here are the tables BEFORE

First thing I did was wipe off all the dust and any dirt, etc from the surface. Then, using a clean rag I wiped them down all over with a product called Liquid Sandpaper. This stuff takes the shiny finish off and makes the piece tacky, so that paint will stick to it. MUCH faster than sanding it down totally, and since we are painting it, I just needed to dull it down, didn't need to strip it all the way.
Next, I took my trusty can of spray paint ( I LOVE spray paint) and sprayed a coat of black paint all over the tables, ( I removed the knobs first).
After letting the first coat dry, I gently rubbed over it with steel wool just to again dull it up a bit and make it not so sticky. Then, I sprayed a second coat of paint on the tables. 2-3 coats should be good, but make sure you are doing smooth strokes and not holding the can too close, or it gets splotchy and the paint drips and runs. If you notice drips after it dries, don't worry, just sand them down with some sand paper or steel wool.
After it was all painted and dry. I decided I wanted a cool distressed pattern on the table tops..> I am not good at free hand drawing or painting and I couldn't find a big enough stencil for the top and was scared to use a little one, for fear I couldn't match it up good. Then I had a great idea!!! The rubber door mat stencil was born!!
I got this mat at Lowe's on clearance for $9 or something. It was the perfect size! It was a little long, but fit good. I took brown paper and placed it under the edges of the mat, so the paint wouldn't mist or spray on the other areas. I taped extra paper underneath too. Then, I laid my mat on the table like a stencil. I then used grey spray paint and sprayed over the entire table top with 2 coats.
I only let it dry a few minutes, so the mat wouldn't stick to the table or the paint. here is what it looked like.
At this point, I was pretty excited! However, my living room is very distressed farmhouse looking style...and this was too clean and perfect. I needed to rough it up a bit! Plus, our end tables get a lot of abuse so I wanted something that looked worn on purpose and would stand up to dog claws, wet cups, and a toddler! I decided to sand all over the top. I did this was a medium grit sanding block and just randomly rubbed back and forth, with the grain of the wood. I took a lot of paint off and then rubbed the edges of the table to show the brown original stain underneath on the edges and legs.
Once that was gone, I took a spray can (I told you , I love spray paint!) of clear poly type varnish, in a matte finish and sprayed the entire table down with 2 coats. This will keep it from some damage and make it easy to dust and wipe down spills, etc without damage to the paint job. It also makes the table smooth and easy to dust, etc...
The finishing touch was these AWESOME giant crystal looking knobs I picked up at Hobby Lobby. They have, by the way, the BEST selection of knobs, drawer pulls ,etc and they are very often 40% off on sale.
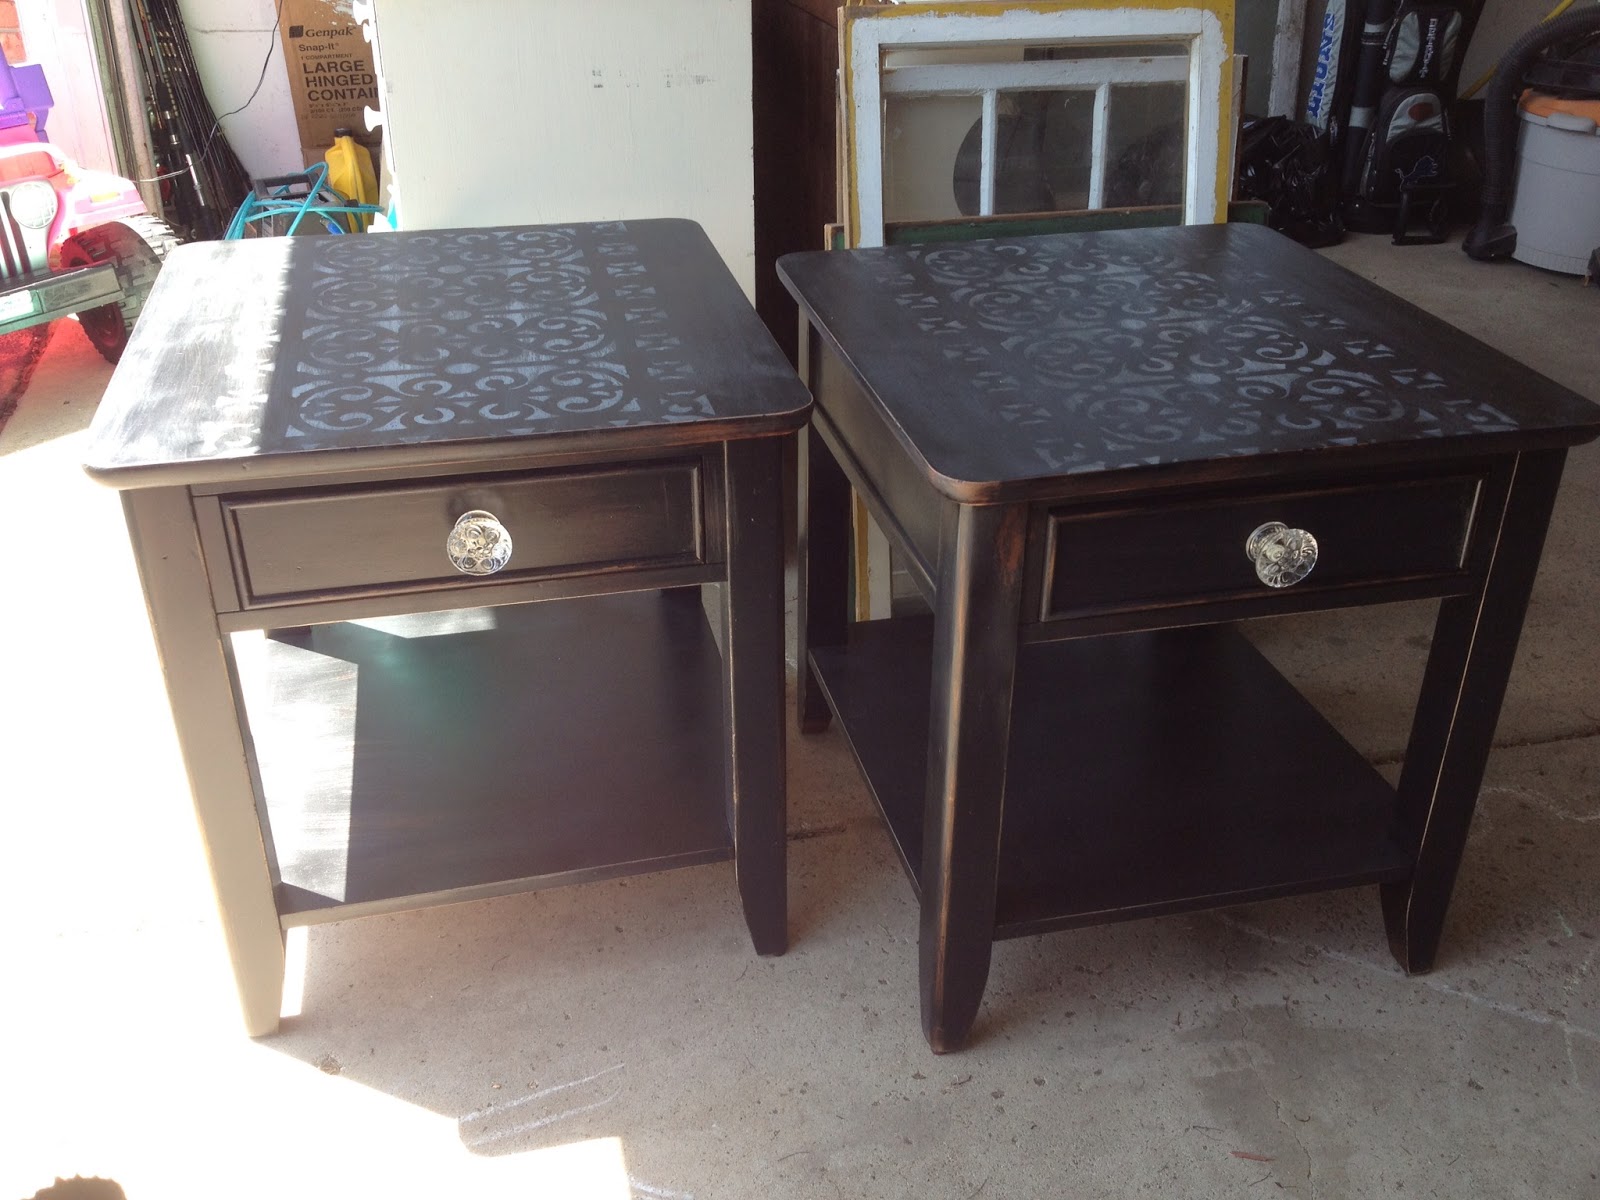
Here are the finished tables!
I LOVE them and 8 months later almost, they are in awesome shape still. We use them all the time and they go through abuse at our house! I don't use coasters and refuse to own furniture that requires them! I like furniture that we can "live with ", and use...without worry! The paint looks great still and we dust them with polish and a rag and spills wipe up easy with a wet rag and dry towel and I couldn't be happier! I get SOOOOO many compliments on them, they are unique and show off my style and personality and I love the distressed style of these.
As far as the rest of my living room, I will be featuring details on how I re-did that fab grey dresser you see and the china cabinet and the old farmhouse door! As well, as our TV stand that you can't see. This room was a work in progress and I am looking for some DIY curtains next and then it will be done!!!